


In this tutorial, we will go through how to Create a Point-of-sale order on BrandDrive.
At BrandDrive we enable you to elevate your customer experience, increase your speed and efficiency, boost your takeaway service and power your business with real-time data. It’s time to move your physical business to a system that works.
Every business owner’s priority, among others, is to keep track of where their customers execute their payments for goods or services. When customers make payments in-store or online, our system automatically generates an electronic receipt.
Setting up your point of sale (POS) order on BrandDrive.
To access the point-of-sale feature:
Step 1: Log in to your BrandDrive account.
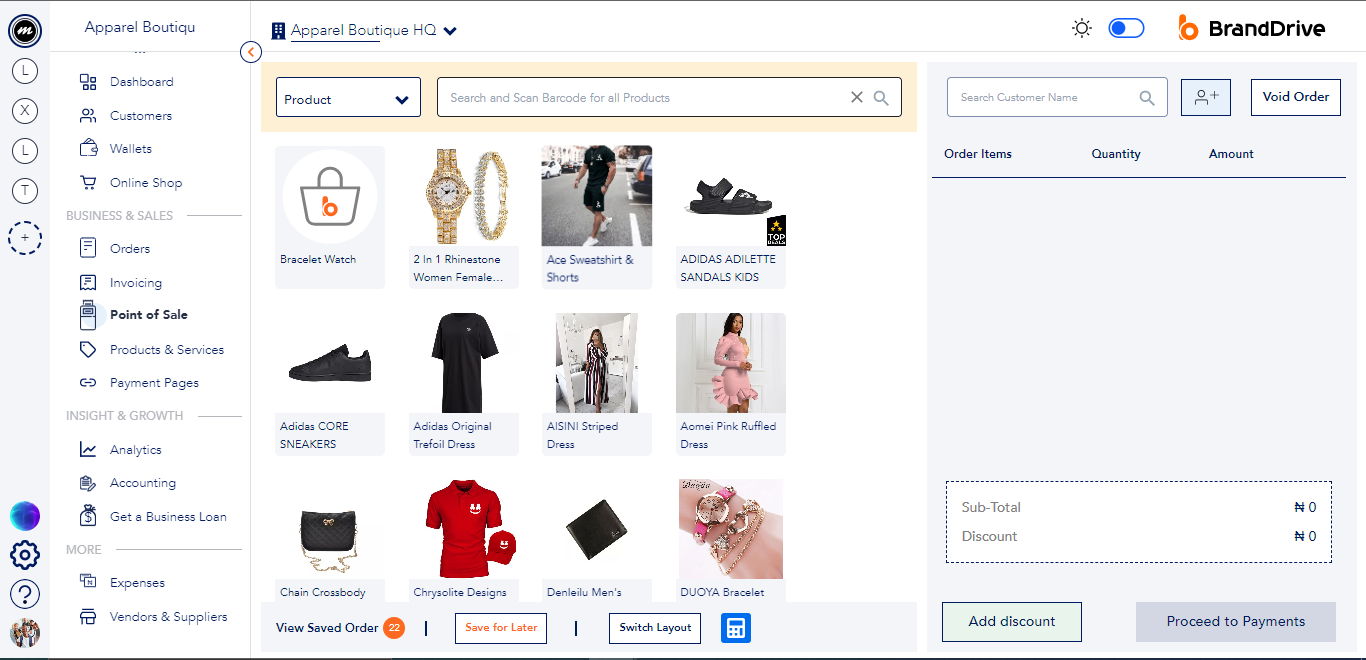
Step 2: Select the point-of-sale feature on the left side of the dashboard.
The BrandDrive point-of-sale feature is built to accept payment for goods and services.
Step 3: Select the product or service you would like to pay for.

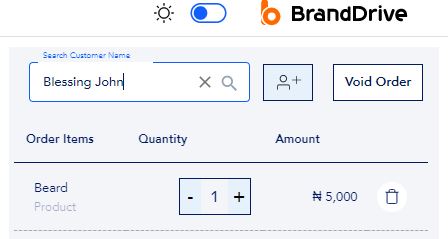
Step 4: Click on the search box to access the list of already-registered customers.

Type in the name of the customer in the search box.
You might ask: What if their name is not on my customer list?

To quickly add customers to your BrandDrive business account, click on the + button near the search box and fill in their name and details. Additionally, for a step-by-step guide on adding customer details, click here to access the customer guide.
In case you change your mind and decide not to proceed with payment, you can make use of the “id order” feature located next to the “add new customer” feature. This feature allows you to easily cancel your order.

Step 5: Add a discount to your order.
To add a discount to your product order, simply select the discount button located next to the payment option at the bottom right of your screen. You can then use the percentage slash to apply the discount.

To do so tap on the discount icon
Then select the percentage you choose to add to the product.

You can either choose to go with the percentage (%) slash or create a discount by amount.
Quantity: Add the quantity you want to order.
Delete: If you decide not to proceed with an order, you have the option to delete it. Simply click on the delete button to remove the order from your list.
Save later: If you don’t want to proceed with the order at the moment and want to come back to it later, you can use the save order feature to save the order for a later time.
Select the “Save Order” option.

Step 6: Proceed with the payment.

Click the “proceed to payment” button and allow the payment modal to load.
After which, you will be taken to another page to confirm your payment.

Choose the payment option you want to use, as seen in the screenshot above, and then check the Print transaction box.
Step 7: Confirm payment and print the receipt. Click on the “Confirm Payment” option to complete your transaction. and then proceed to print the transaction receipt.

BrandDrive Point of Sale & Inventory feature is the ultimate system for a physical store. Our advanced features help you serve customers practically while collecting data for important business decisions