


In this tutorial, we will go over, step-by-step on How to record an invoice on BrandDrive
An invoice is the document a seller provides to a buyer to receive payment for goods or services purchased. The invoice includes the cost of the goods and services bought by the buyer, making it an essential document for both parties involved..
BrandDrive invoices are secure, instant, and can be sent through email.
Let’s go through all the steps required to teach you How to record an invoice on BrandDrive
Step 1: Open your BrandDrive app or mobile.
Step 2: Navigate to “Invoice,” which is the second option under the Business and Sales category, at the middle left corner of your dashboard.
The screenshot below is a typical interface you’ll see on your Branddrive app.
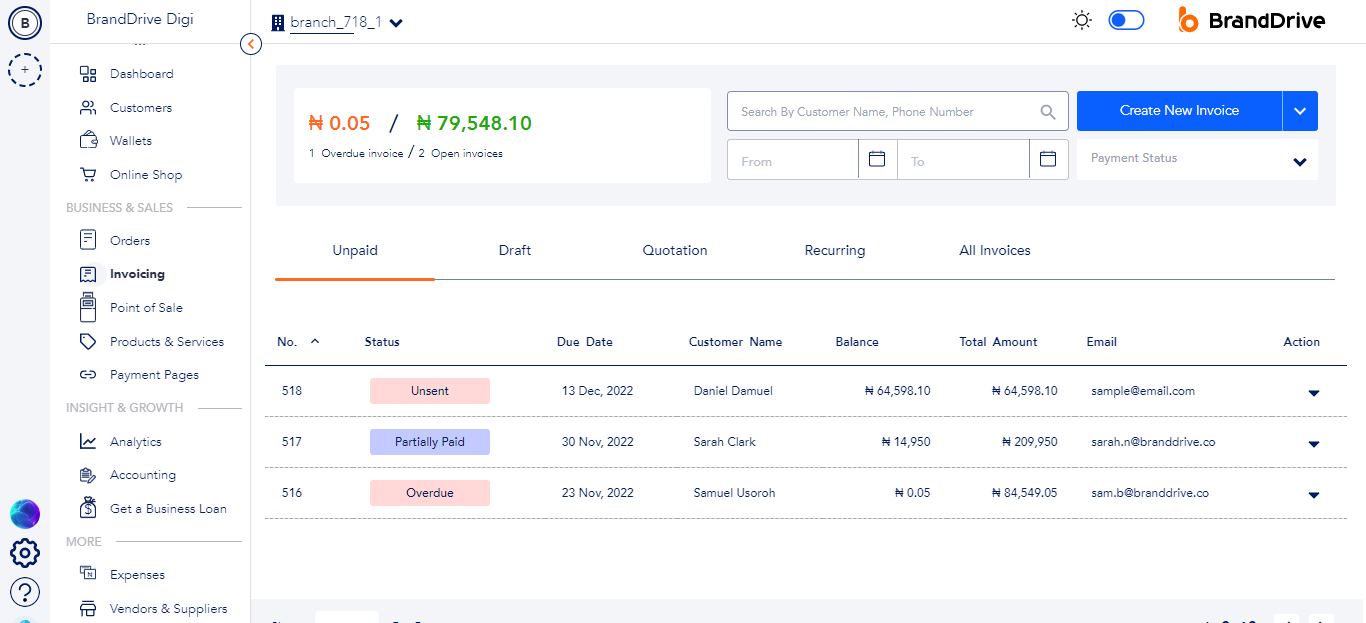
BrandDrive/invoicing
Simply by glancing at your BrandDrive account, you can quickly view your invoice balance. In addition, the balance is divided into two columns to provide flexibility and easy comprehension. Specifically, the balance is divided into overdue invoices and open invoices, allowing for efficient tracking and organization of your finances.
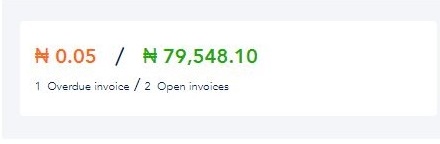
Overdue invoices: An overdue invoice is an invoice a customer has yet to pay.
Open invoices: Invoices that have been sent to your customer or client but have not been paid yet are called open invoices.
Search: When looking for a specific invoice among a large number of invoices, you can use the search box to filter your results. This can be done by typing the customer name or phone number from the invoice you are looking for. The results will be sorted accordinglyYou can further refine your search by including a date.
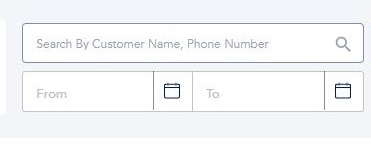
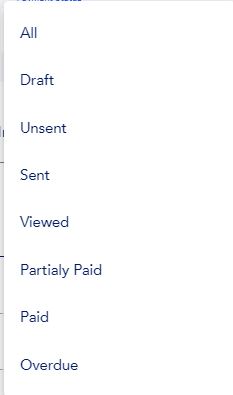
Payment status: You can also use the payment status to filter your invoice search into draft, sent, viewed, partially paid, unsent, paid, and overdue.
Step 3: To create a new invoice, click “New Invoice” near the search feature to create a new invoice.

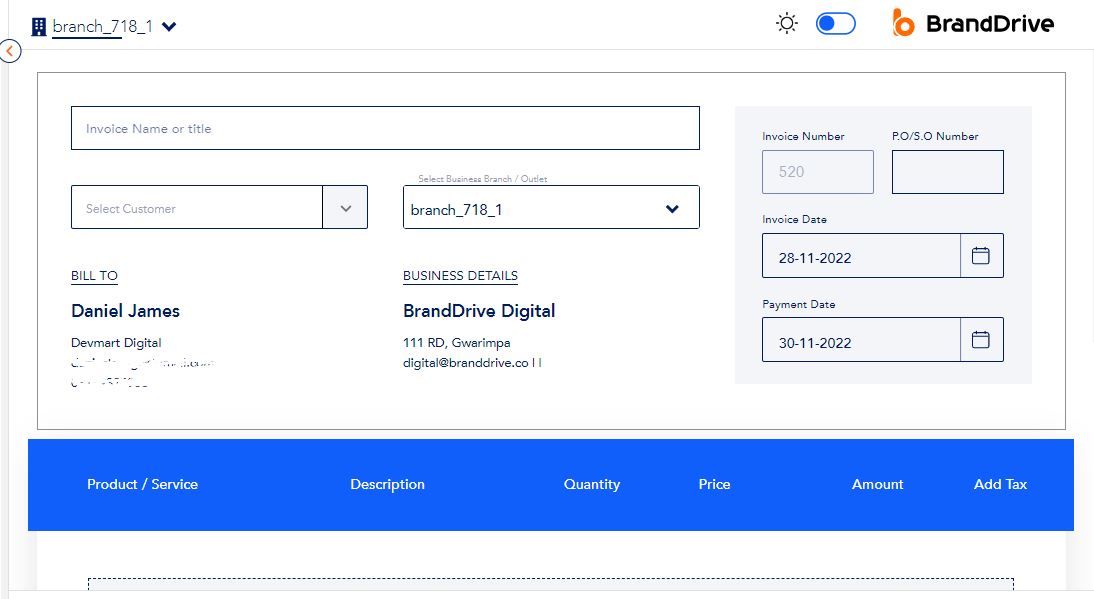
Step 4: Fill in your invoice details: Firstly, enter the name of your invoice, followed by entering the branch, and selecting the customer from the list of customers you have on your list. Afterwards, input the invoice date and lastly enter the payment date you would like to make the payment.
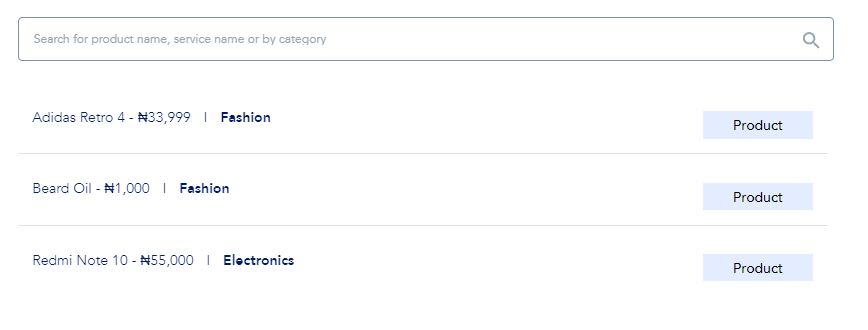
Next, click on “Add product or service” to see and choose from the dropdown of the listed products or services.
You can use the search to find specific products you are looking for.

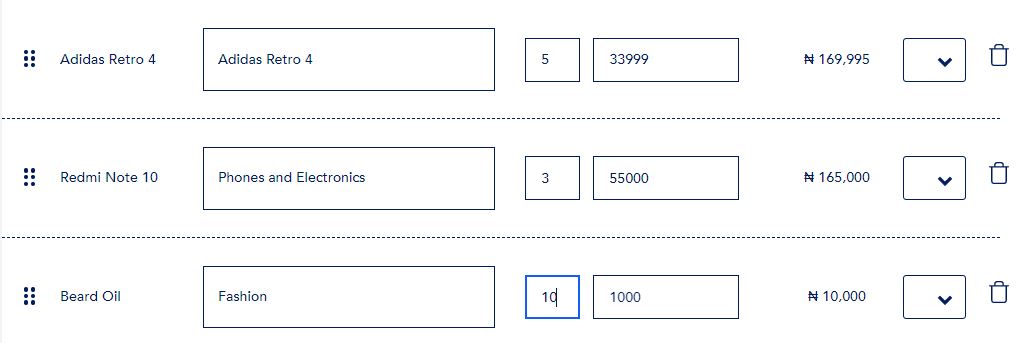
You can also add the quantity of the product and delete a product. Check out the screenshot below to see
.
Step 5: Select your payment method: To select from the list of payment methods, check the payment box, add a note to the invoice, and finally preview the product/service balance.
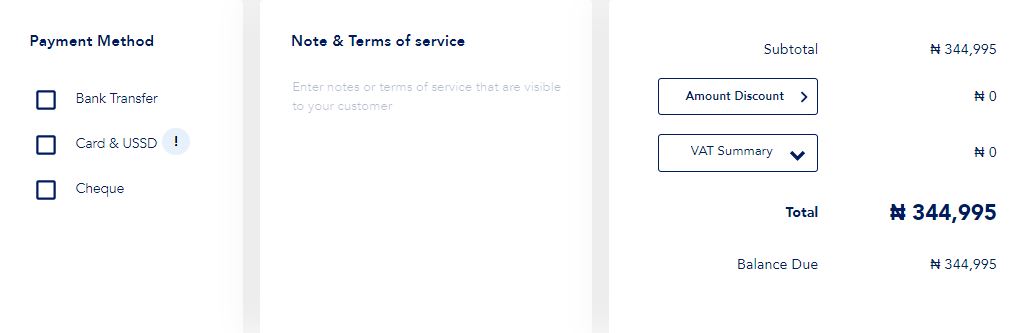
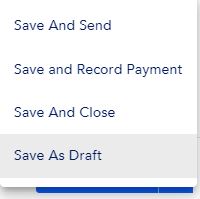
Step 6: Save your invoice: After you have finished entering the details of your product, proceed by saving your invoice.

You can select the best option for your needs from the Save drop-down menu.
The primary purpose of an invoice is to record sales and serve as proof of payment. Additionally, it can help small business owners with their accounting
We do hope that hope with this tutorial, you have learnt How to record an invoice on BrandDrive.